Rebuilding Aristide Benoist's portfolio website as an example.
My versionChallange
To create a visually appealing, but complex project with WebGL/ThreeJS.
Why read it?
If you want to do these type of projects, but don't know where to start, consider it as a starting point.
A few words
In the winter of 2020, when I was a second-year Computer Science student at University I had to pick an internship, which meant that I had to decide on the general direction I will move on as a professional. By that point I have come to the conclusion that I want to move on as a Designer and Developer, because I have completed several projects and was fairly confident in my web development skills, and most importantly I was enjoying the process.
In my mind: "Whatever your passion is, be the best at it". At the time I stumbled upon the Awwwards website and Aristide Benoist's works. It kind of struck me, and I thought: "One day I will create these types of projects as well". It had been 3 years since then and the time has come.
Note that this is NOT a tutorial with complete code, but rather a guide to understanding the logic behind how things work together. I believe if you get the idea, you can write your own code.
Aristide's portfolio website at motion.
Project overview
You might be wondering why his page is not typical, while 99.9% of internet pages allow you to scroll along the page to view the content, in this one everything is moving within the frame. In the developer's language, the body height is 100vh. Which forces you to manually manipulate elements to move to imitate scrolling or any other action.
The page is broken down into layers that contain specific types of content. In this project, in the body, there are 3 primary layers. If you pay attention to the animated text that appears whenever you click on the image, the letters are above the image, and when you click "EXPLORE" the new image appears to be on top. This means that the 3D scene is below the animated text, and the new image is above the text. Obviously, this is achieved with z-index.
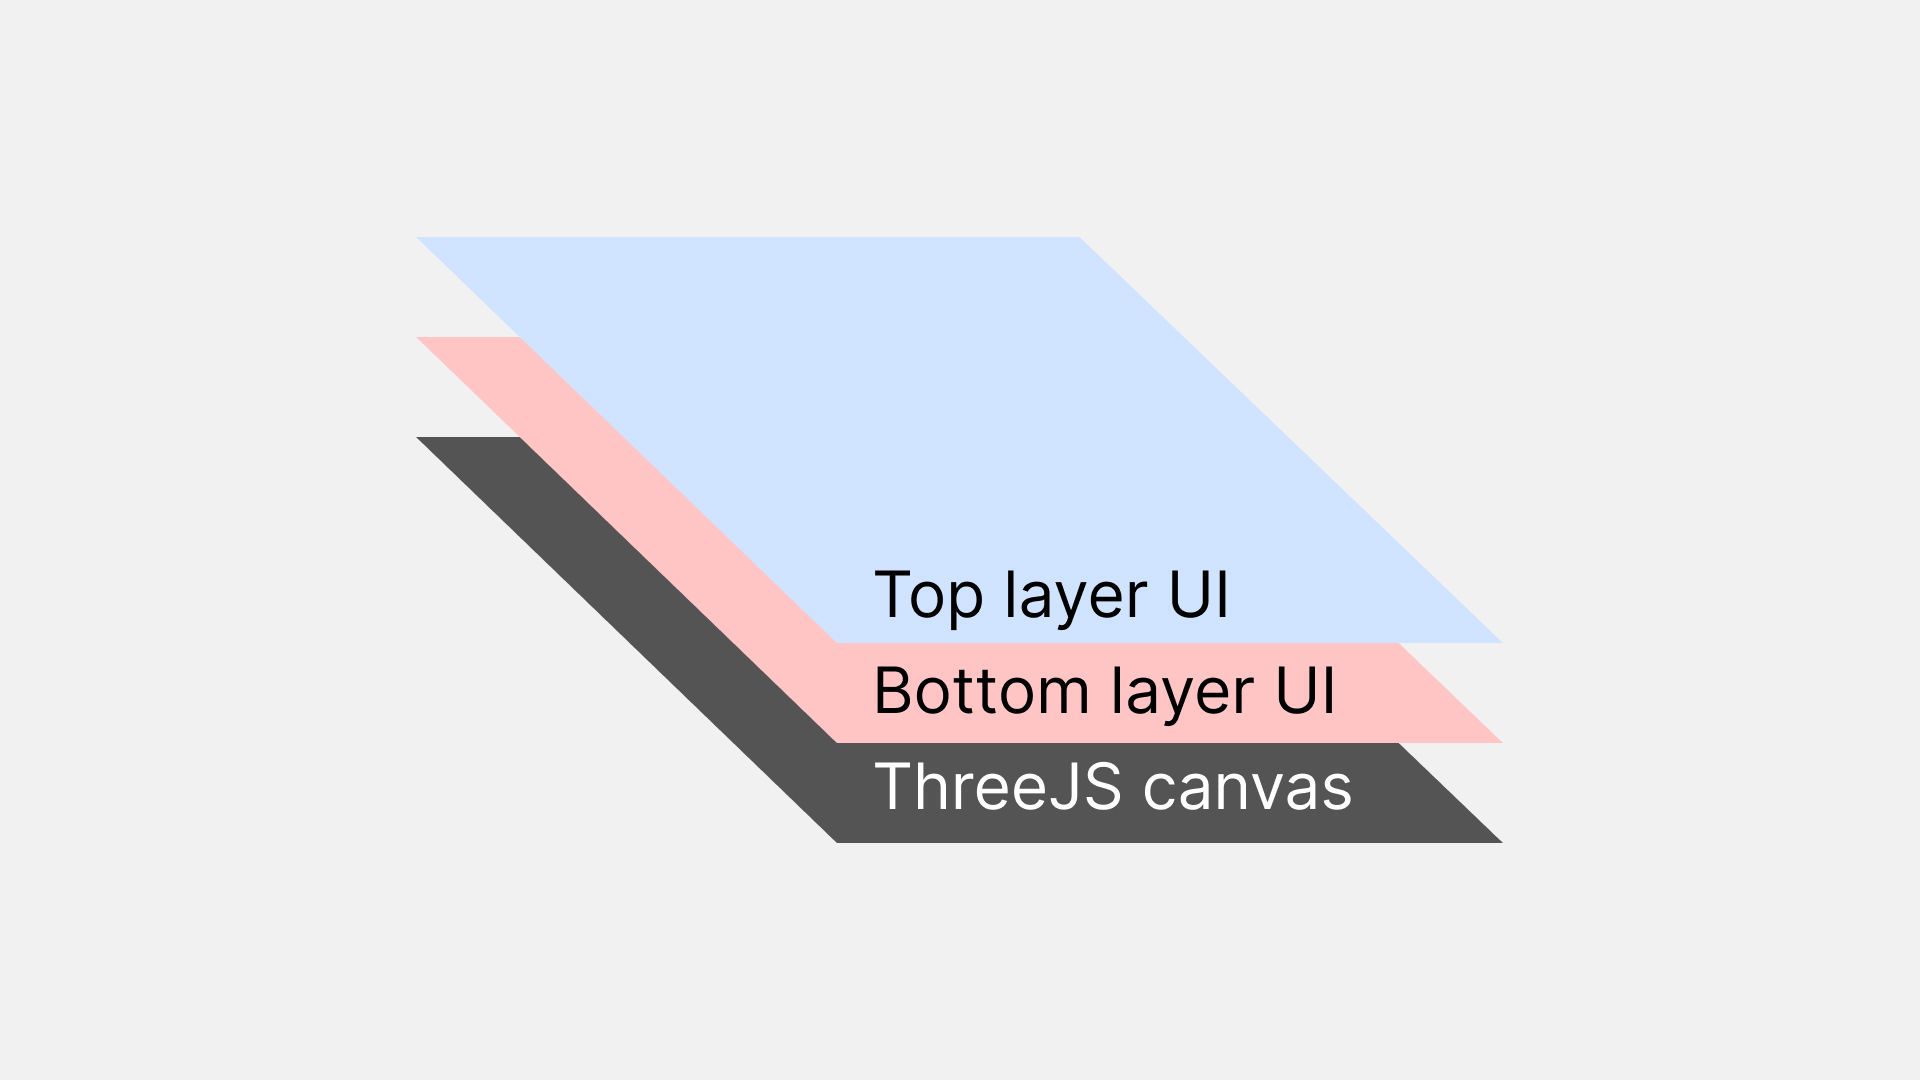
Layered page structure.
Getting hands dirty
3D scene
Let us start with the most interesting thing here 3D. Nowadays, WebGL handles 3D tasks, but the steep learning curve does not make things easier. Luckily there is a ThreeJS library which simplifies the entire process of writing 3D code without losing any performance.
I used ViteJS as a bundler, I advise you to do the same if you are not familiar with other tools. When you follow ThreeJS introduction, you will have a nice shiny cube in your scene. The cube has certain dimensions and is typically located at the centre of the scene, meaning (0, 0, 0) as its coordinates. Now, note that whenever you move the cube across the scene by setting a specific position, it will move across your screen by a certain amount of pixels. Suppose 1 unit is 15 pixels on your screen, what does it mean? It means that whenever you move your cube across the scene by 1 unit, you will move it 15 pixels across your scene. Now the problem is, with 3D elements, we are trying to imitate UI, you might have a question by now: "If I want to imitate an image with, for example, 300x75 pixel dimensions, what unit size do I set to my cube?". Luckily there is a method to (approximately) map scene units to the page's viewport pixels.
const perspective = 800;
const fov =
  (180 * (2 * Math.atan(window.innerHeight / 2 / perspective))) / Math.PI;
const camera = new THREE.PerspectiveCamera(
  fov, window.innerWidth / window.innerHeight, 1, 1000
);
camera.position.set(0, 0, perspective);
Formula to map space units to viewport pixels.
This method puts the camera at a distance with a specific FoV which does the trick. With this, you are able to imitate UI elements but they are 3D objects. The next step is to create 30 rectangles of specific size and position them. Note that you have to iterate through rectangles and set each rectangle's position with a formula, taking into account the gaps and other things you might want to add, meanwhile, in CSS you would simply set the display to flex and add the gap.
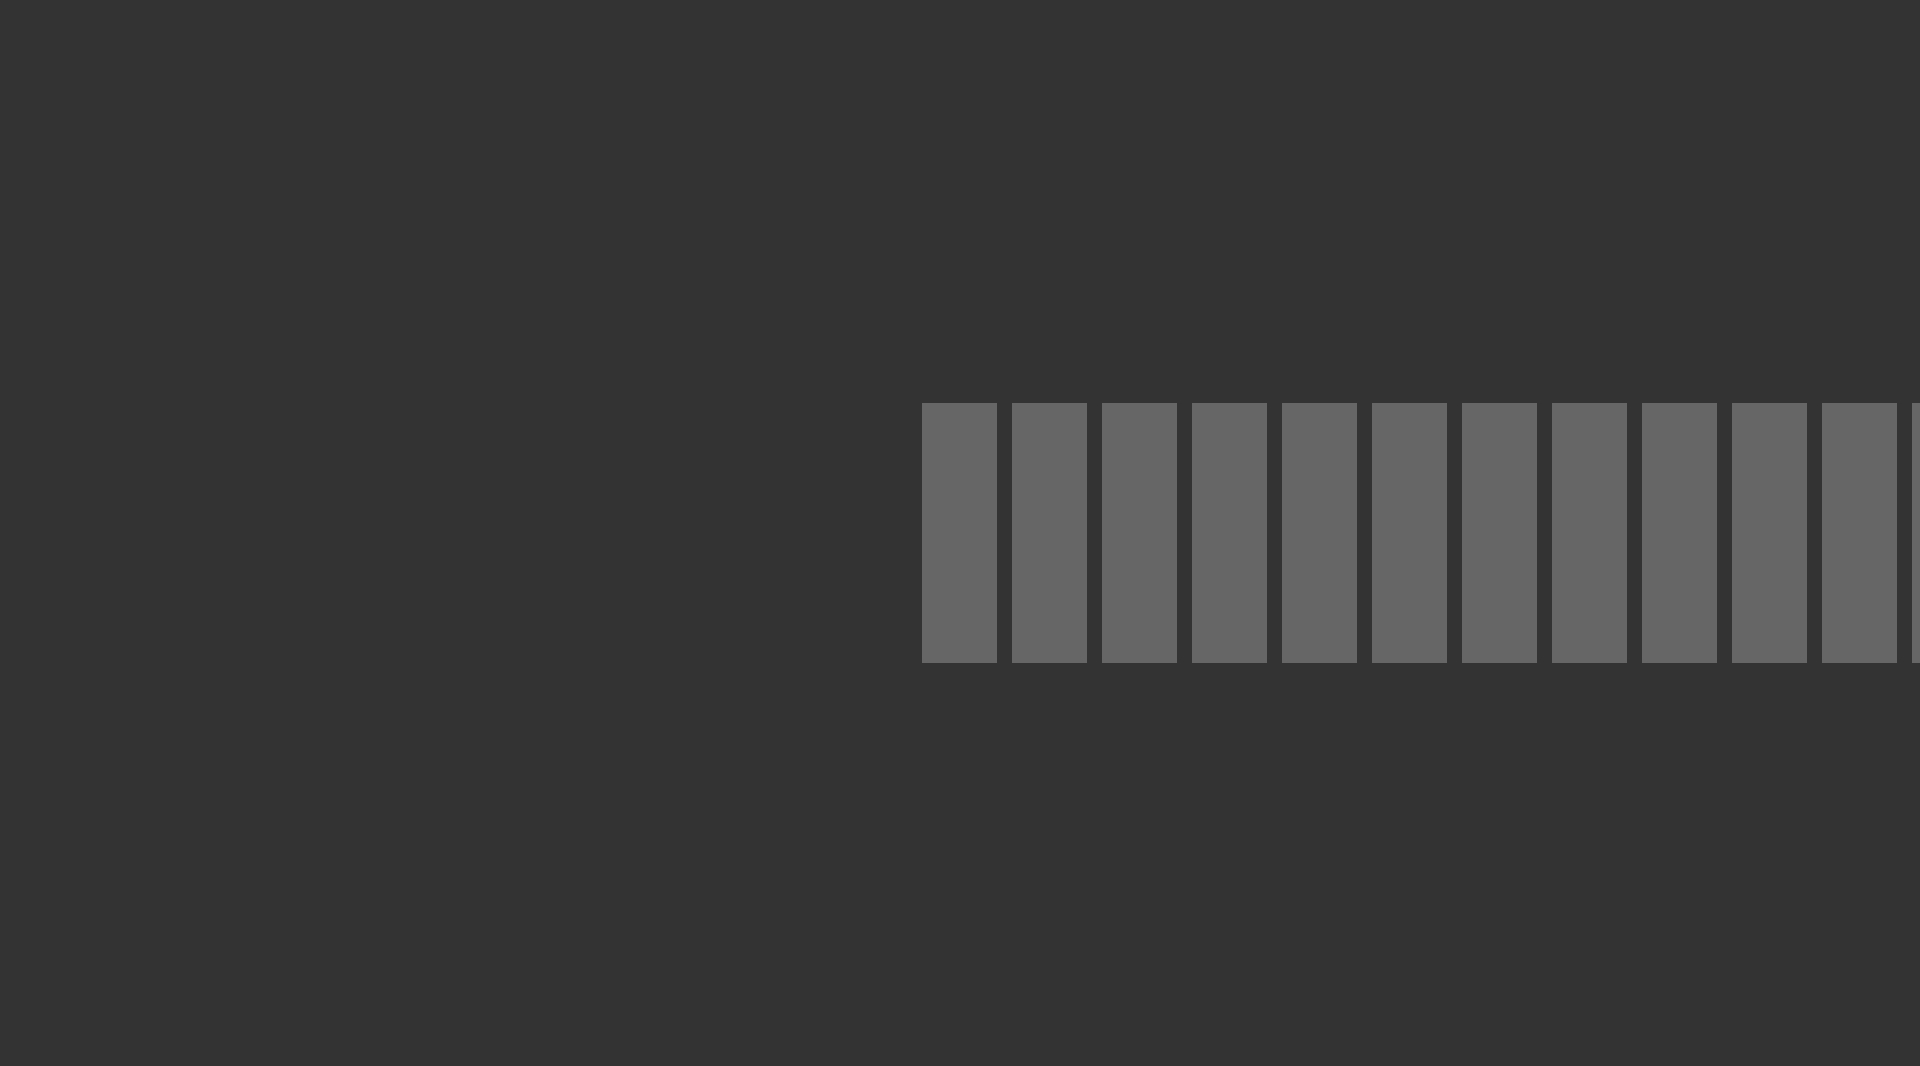
Stack of grey rectangles.
Moving the camera
Now you have a stack of rectangles. It is the time to add animations and images. But first things first - the camera. In order to imitate smooth scrolling, you need to move the objects across the scene, or the camera. Naturally, you will use the "wheel" event listener, and use the event.deltaY, but if you set the camera position to event.deltaY your scrolling will be abrupt. To smoothen it I used GSAP, specifically the "to()" function. It takes a value let us say 0, and the target value let us say 10, and smoothly transitions the value from 0 to 10 over a specific duration. There are numerous libraries out there which let you do this thing, I stuck with GSAP. Also, note that GSAP allows to set easing functions which is crucial for other animations.
Now with the help of GSAP, you are able to move the camera from one point to another smoothly within some time, say 0.5 seconds.
Shaders and a bit of math
Now you have a moving camera and a stack of rectangles. The next step is to add images. The method is to use a ThreeJS preloader together with a Texture loader and load images sequentially. Then you save the returned values as textures and use them in materials for your planes. The textures are loaded with shaders. Hence we use ShaderMaterial for the planes.
There are 2 types of shaders: vertex and fragment shaders. Vertex shader manipulates the geometry of the object, while fragment shader controls the colour of each pixel. "The Book of Shaders" is a great starting point to understand how shaders work.
Once you import and set the images as textures you may notice that the images are distorted. Either squeezed or stretched depending on the dimensions. This is because the texture is applied like this by default. To fix it and imitate the behaviour of CSS's "object-fit: cover", we need to tell the vertex shader to handle the image.
varying vec2 v_uv;

uniform float imageRatio;
uniform float planeRatio;

void main() {
  vec4 pos = vec4(position, 1.0);

  // where ratio means Width / Height
  if (imageRatio < planeRatio){
    v_uv = vec2(uv.x, uv.y / planeRatio * imageRatio + (1.0 - imageRatio / planeRatio) / 2.0 );
  } else {
    v_uv = vec2(uv.x / imageRatio * planeRatio + (1.0 - planeRatio / imageRatio) / 2.0, uv.y);
  }

  gl_Position = projectionMatrix * modelViewMatrix * pos;
}
Vertex shader.
Now you have images as textures on your planes, and it is time to animate the colours, to do that you need to set fragment shader logic.
uniform sampler2D u_image;
uniform float mixValue;
uniform float opacity;
uniform bool selected;
varying vec2 v_uv;

void main() {
  float v_mixVal = mixValue;
  vec4 image = texture2D(u_image, v_uv);
  float gray = (image.r + image.g + image.b) / 5.0;
  float loc_opacity = opacity;

  if (selected){
    loc_opacity = 1.0;
  }

  gl_FragColor = mix(vec4(vec3(gray), loc_opacity), vec4(image), v_mixVal);
}
Fragment shader.
Note that this is the complete code snippet which covers the colour behaviour for the wave animation as well. We utilize the "mix" function which takes the grayscale image and colour image, and set the value which determines how grey the pixel is. If we hover over or select the rectangle, it is coloured. Also, it is more coloured, the closer it is to the camera (which is always the centre of the screen). Otherwise, the pixel is grey, which forms the entire image.
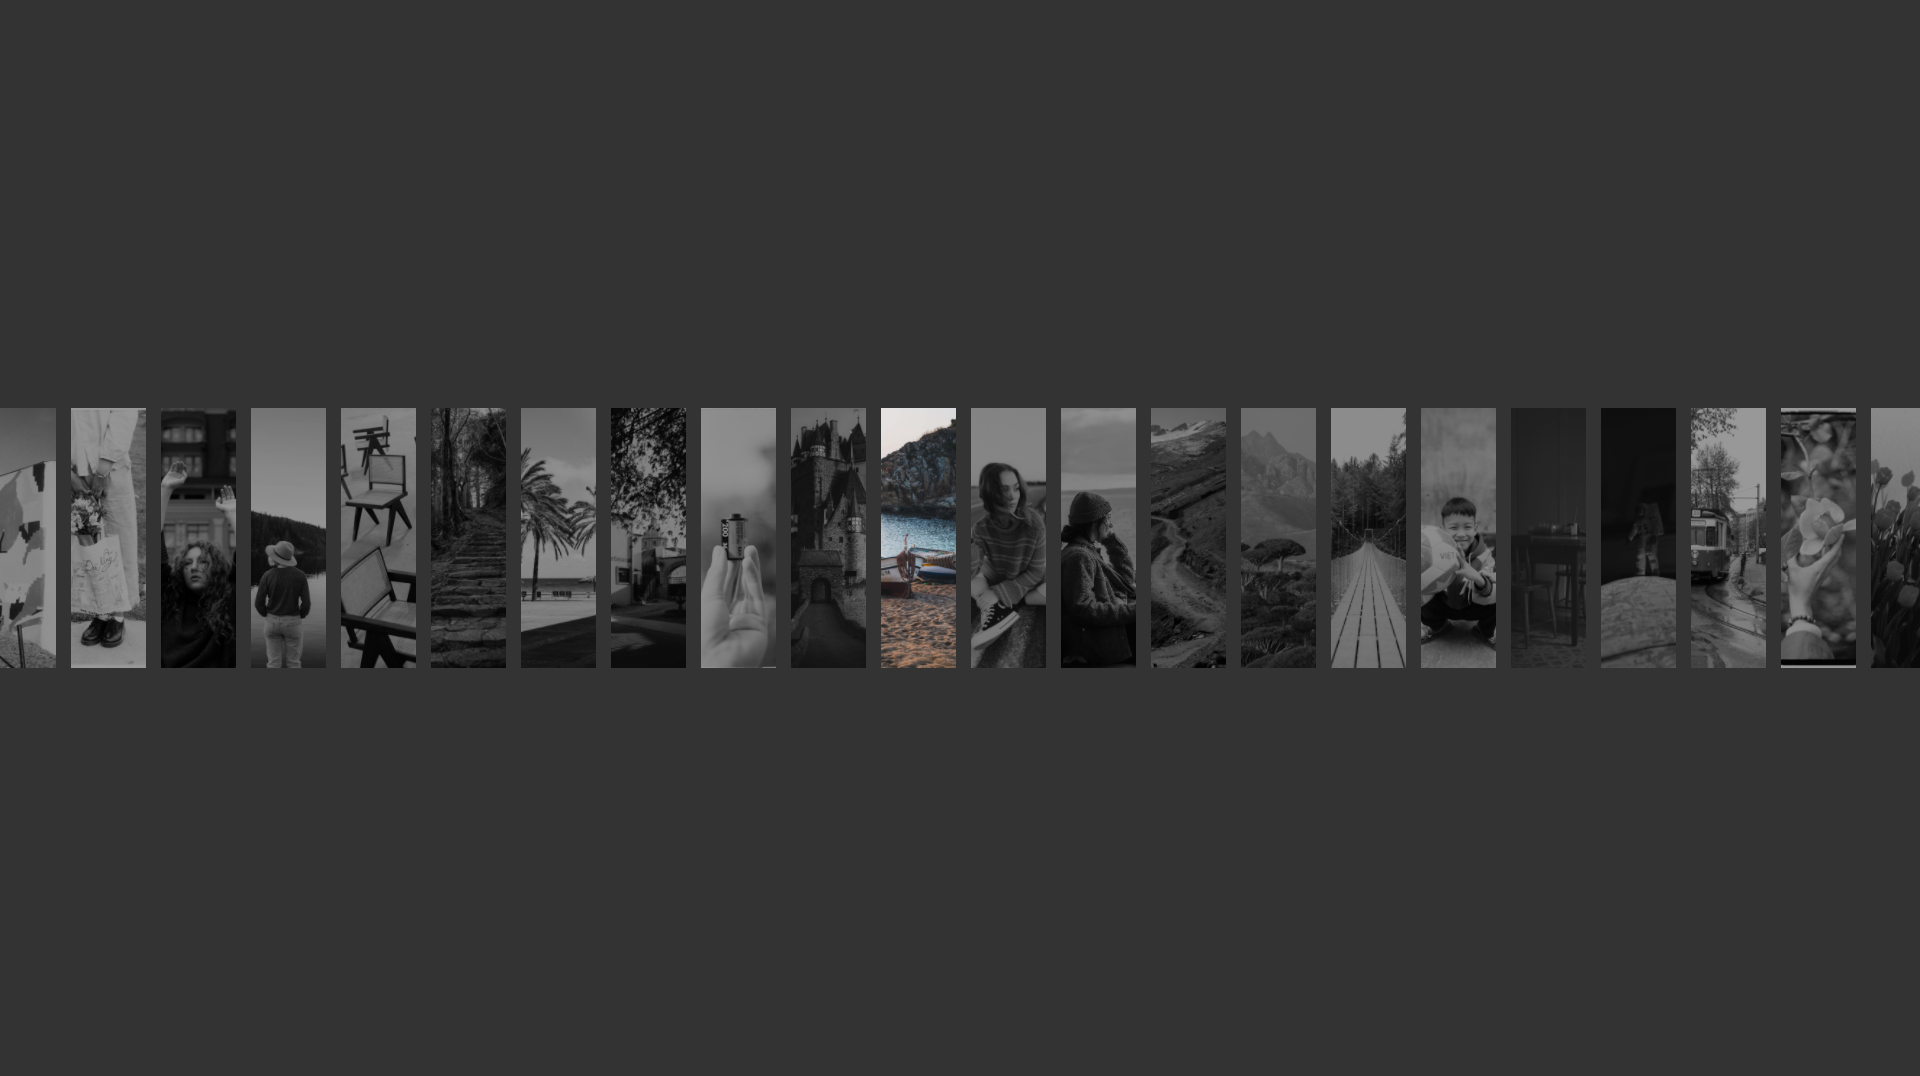
Hovered image is colourful.
Animating the wave
To replicate the animation, we first need to understand what is happening.
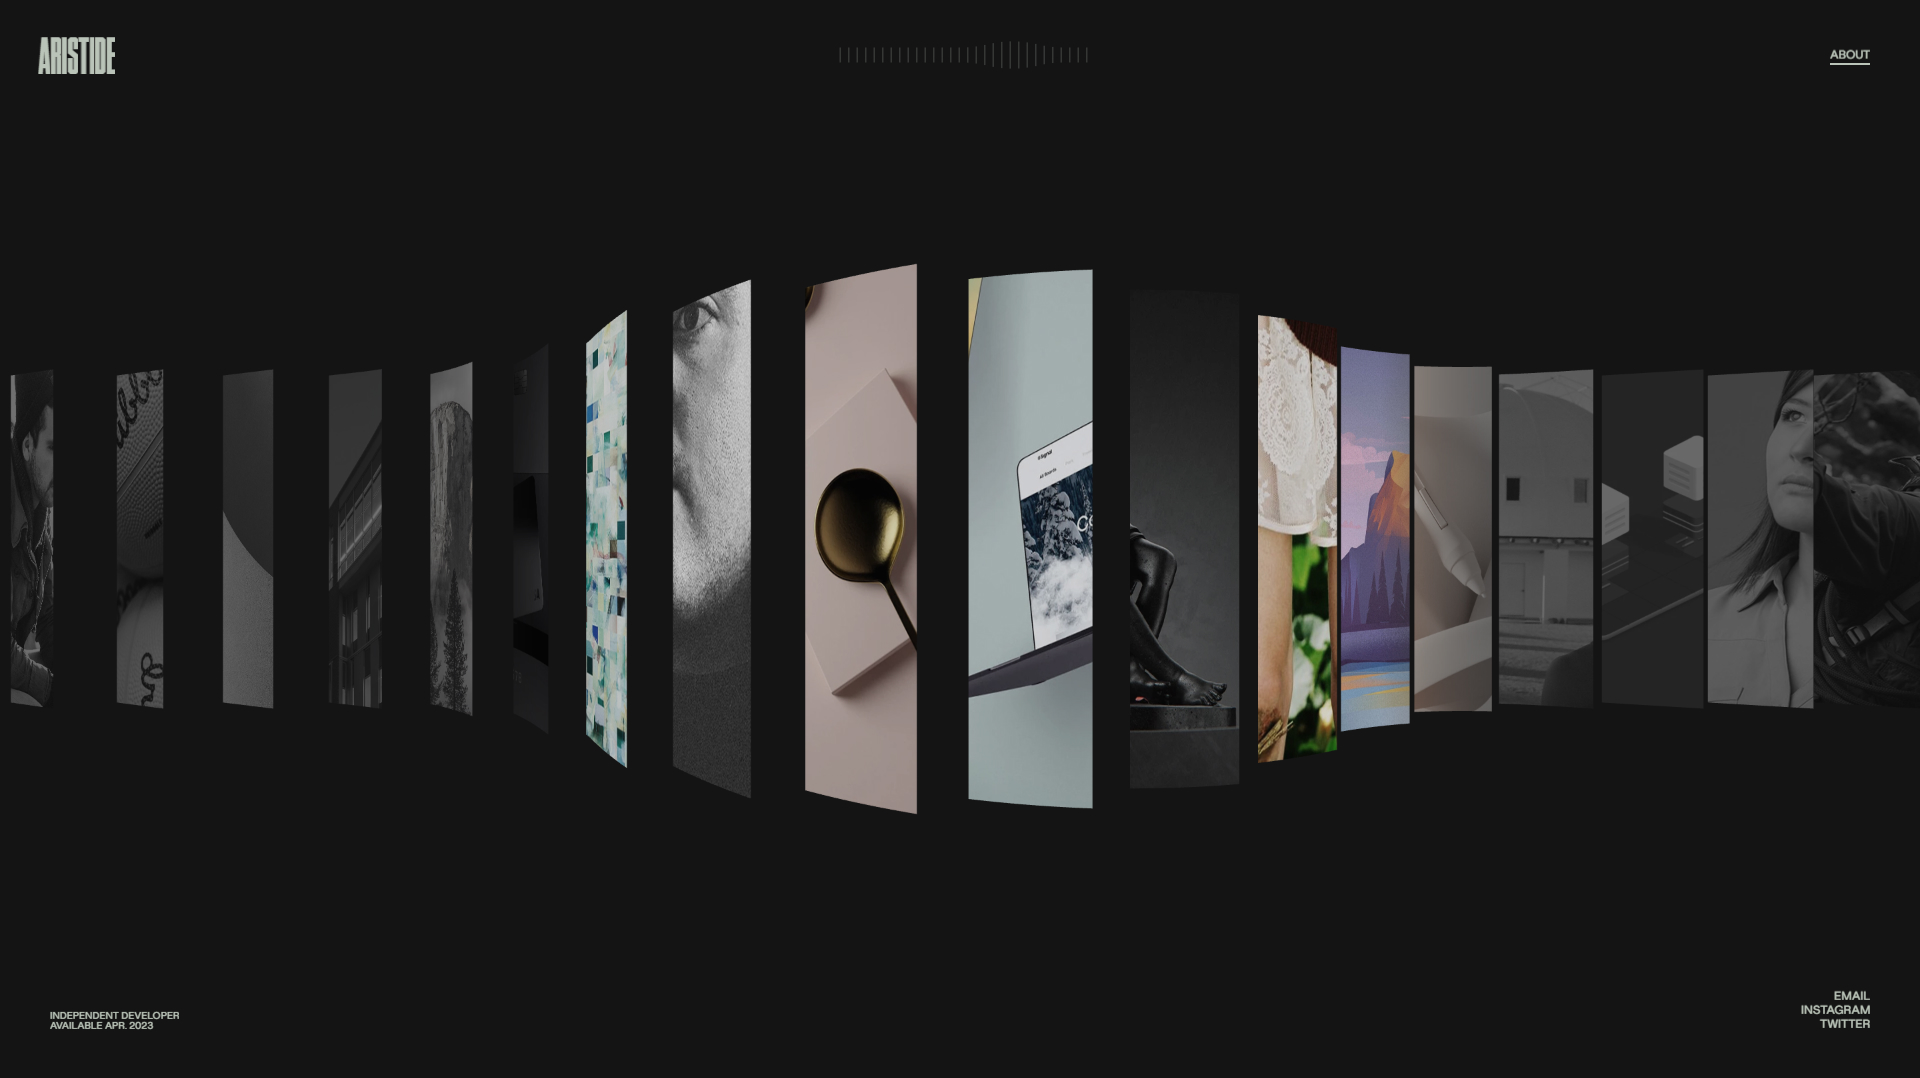
Original wave animation.
We can notice a few rules: 1) the closer the rectangle is to the centre the closer it is to the camera; 2) the Rotation angle is not constant, for the half of the wave it is negative; 3) the Rotation angle varies depending on the difference between the position and the centre; 4) The closer the rectangle is to the centre, more colourful it is.
It is possible to translate these observations into the following graphs.
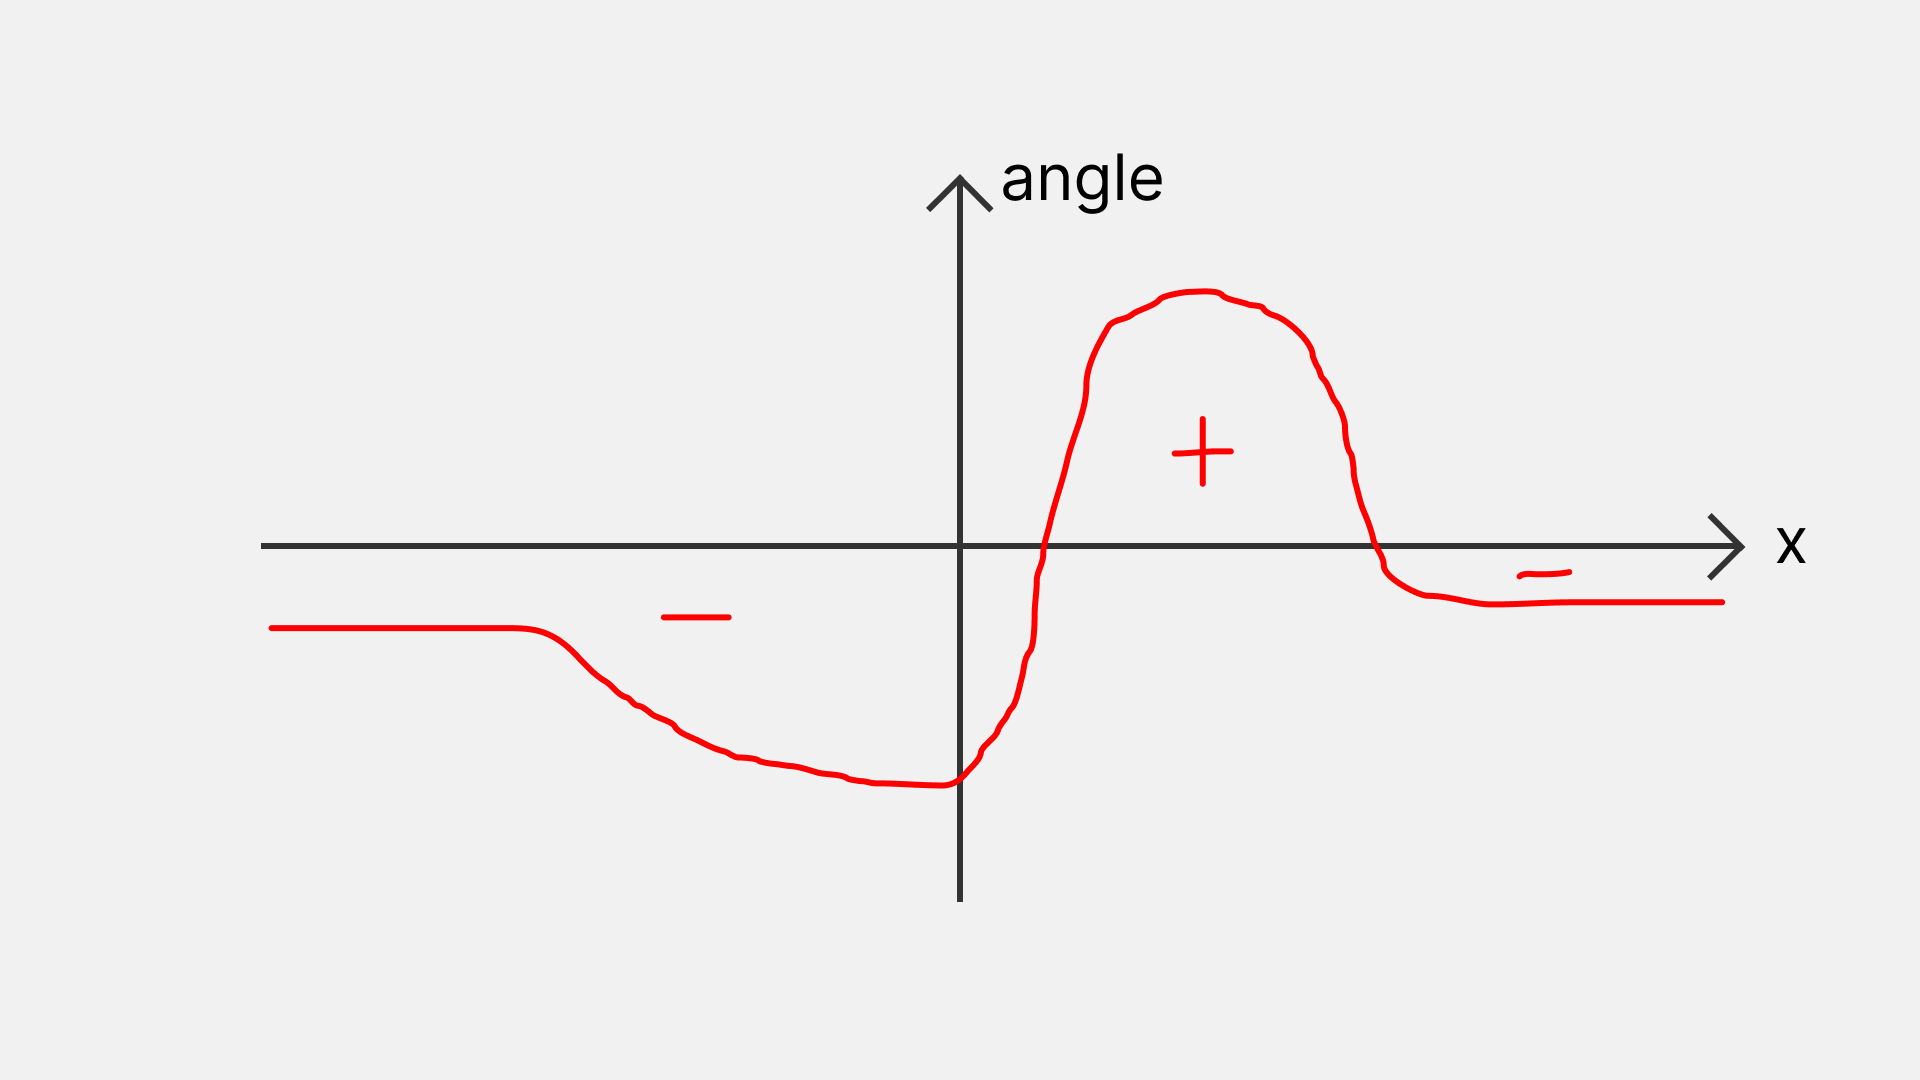
Animation in graph.
Note that there is a variable, let us call it "impulse" which is increased every time scrolling is used. The absolute value of this impulse decreases over time which means that the overall state of the animation can vary from plain grey rectangles (when the impulse is 0), to full wave (when the impulse is 1).
Animation conflicts
Let us imagine the scenario: you have a hidden box with opacity: 0. You create 2 animations, the first to show the box, and the second to hide the box, which means you either change the opacity gradually to 1 or 0. Now let us say you set the animation duration to show the box to 1 second, and the animation duration to hide the box to 0.5s. It creates a scenario where you can launch the animation to show the box first, and immediately try to hide it. In the end, your first animation might not finish earlier than your second one and instead of hiding the object your box will be shown. See the image below.
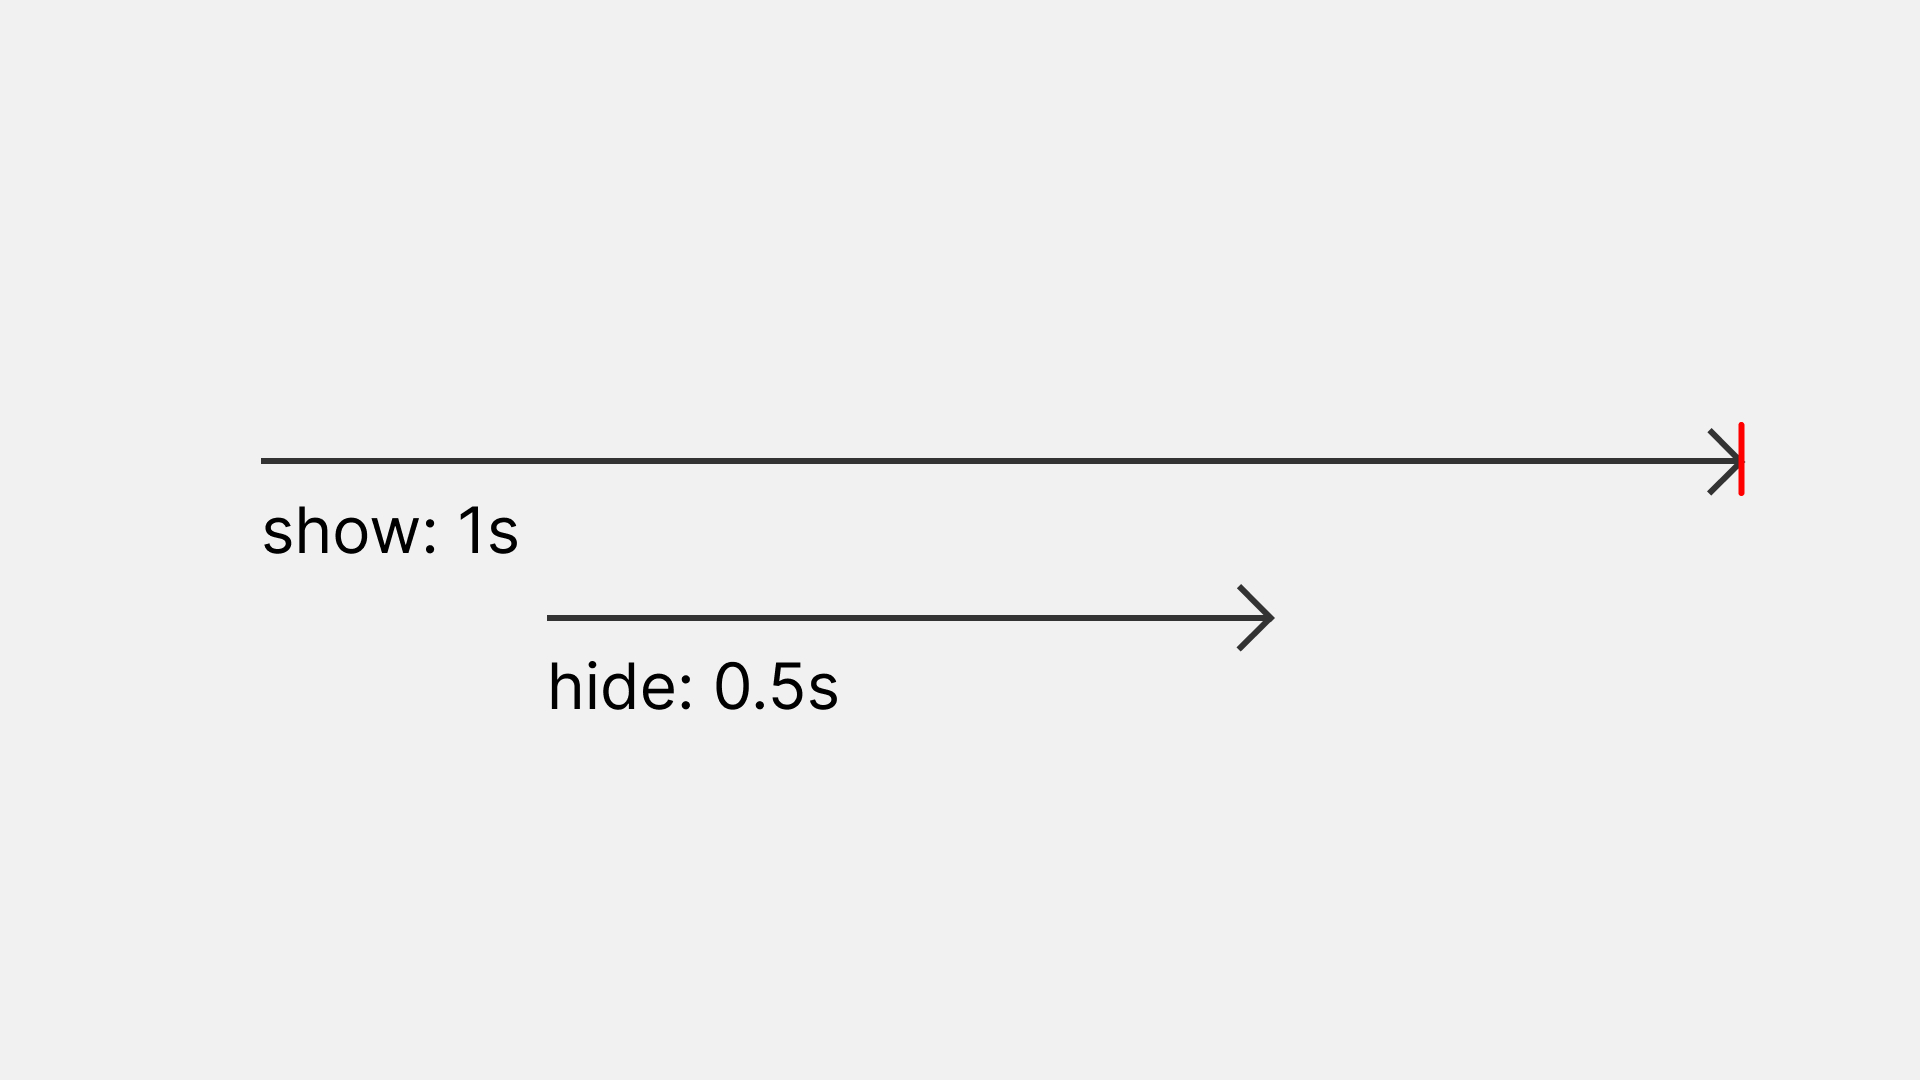
Animation conflicts timeline.
To fix this, use flags, just like in multithreaded programming you may use Mutable Flags. Let us say, you create a Flag (boolean) and when you start the animation to show the box you raise the Flag (set it to true) and inside the onUpdate() animation you check if the flag is still up, if not you kill the animation with kill() function. When you start the hiding animation you set the Flag to false.
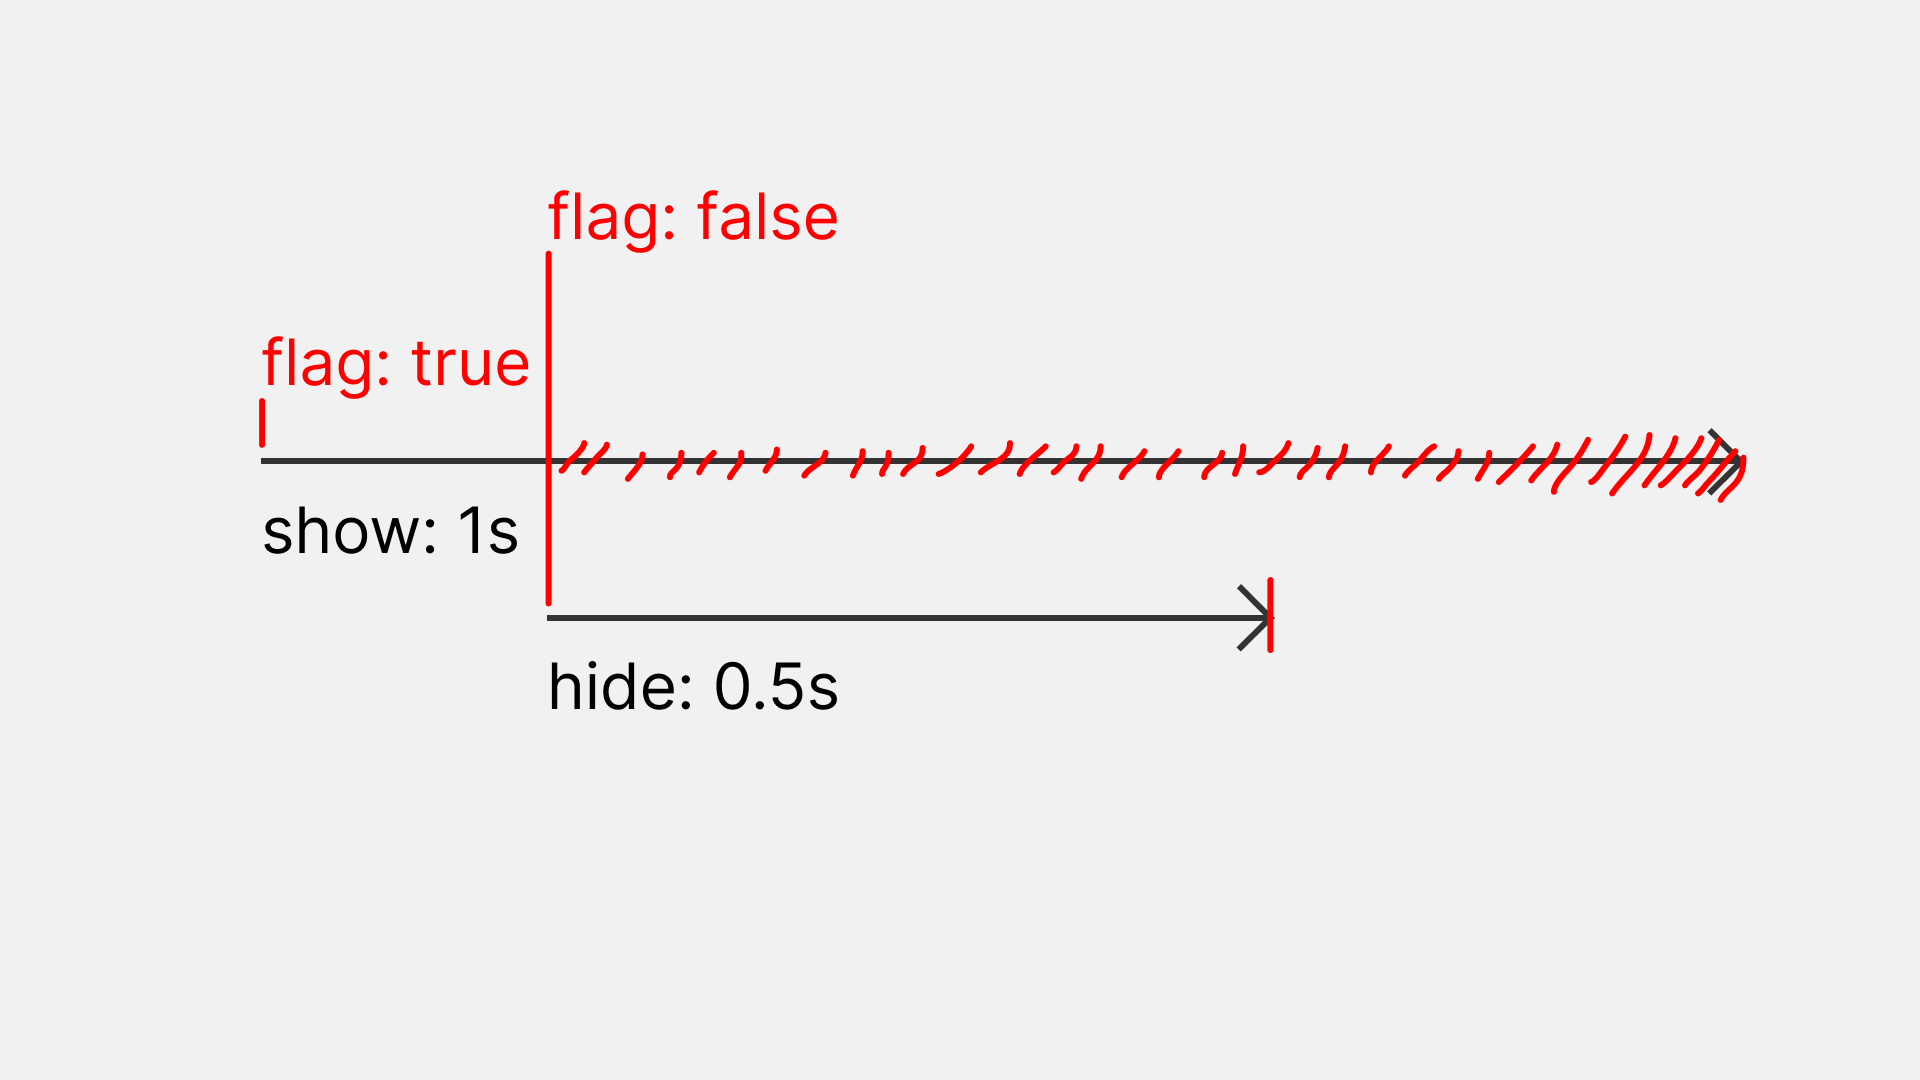
Using atomic flags to solve the conflict.
Page transitions
Ever wondered how page transitions are done? I have spent a lot of time trying to understand how these animations are created, and after trying out numerous libraries none of them left me satisfied. But finally, I figured it out, the best way is to use Browser History API. In order to imitate cross-page animation you put your animation on one page and prevent the link default behaviour. Instead of redirecting the user to the new page, you launch your animation and show the new page manually. Use "history.pushState(obj, obj.title, obj.url)" to change the url in the bar and push the link into the history, which is essentially the same as redirecting the user, but with animation.
Typography
There is not too much to say about typography. It has its own specific nuances depending on the projects you are willing to work on. For this one, typography is located in the middle HTML layer above ThreeJS's canvas. Elements are positioned absolutely, and text is contained in divs with "overflow: hidden", and animated through CSS's "transform" property.
To create this animation, load the text first, calculate the space required for each letter and position the elements sequentially, with some gaps.
Performance optimization
ThreeJS has the main loop which is called to render each frame. So in order to maintain good performance, avoid using redundant code, use set up functions which are called only once.
You may notice lags as the GPU loads the elements whenever you see them in the viewport. To fix it, put every object in a single frame, the first frame and then spread them out as you planned. Hide your first frame with UI layers and remove them once your first frame has finished or at the start of the second one.
There are multiple ways to expand the rectangle upon clicking on it, you may either scale it or set the new geometry. I used the second method. The problem with it is that using the keyword "new" allocates the memory and creates a memory leak, but the old geometry is still saved in the memory even though it is not used. Use methods like ThreeJS's "dispose()" to avoid situations like this.
Results
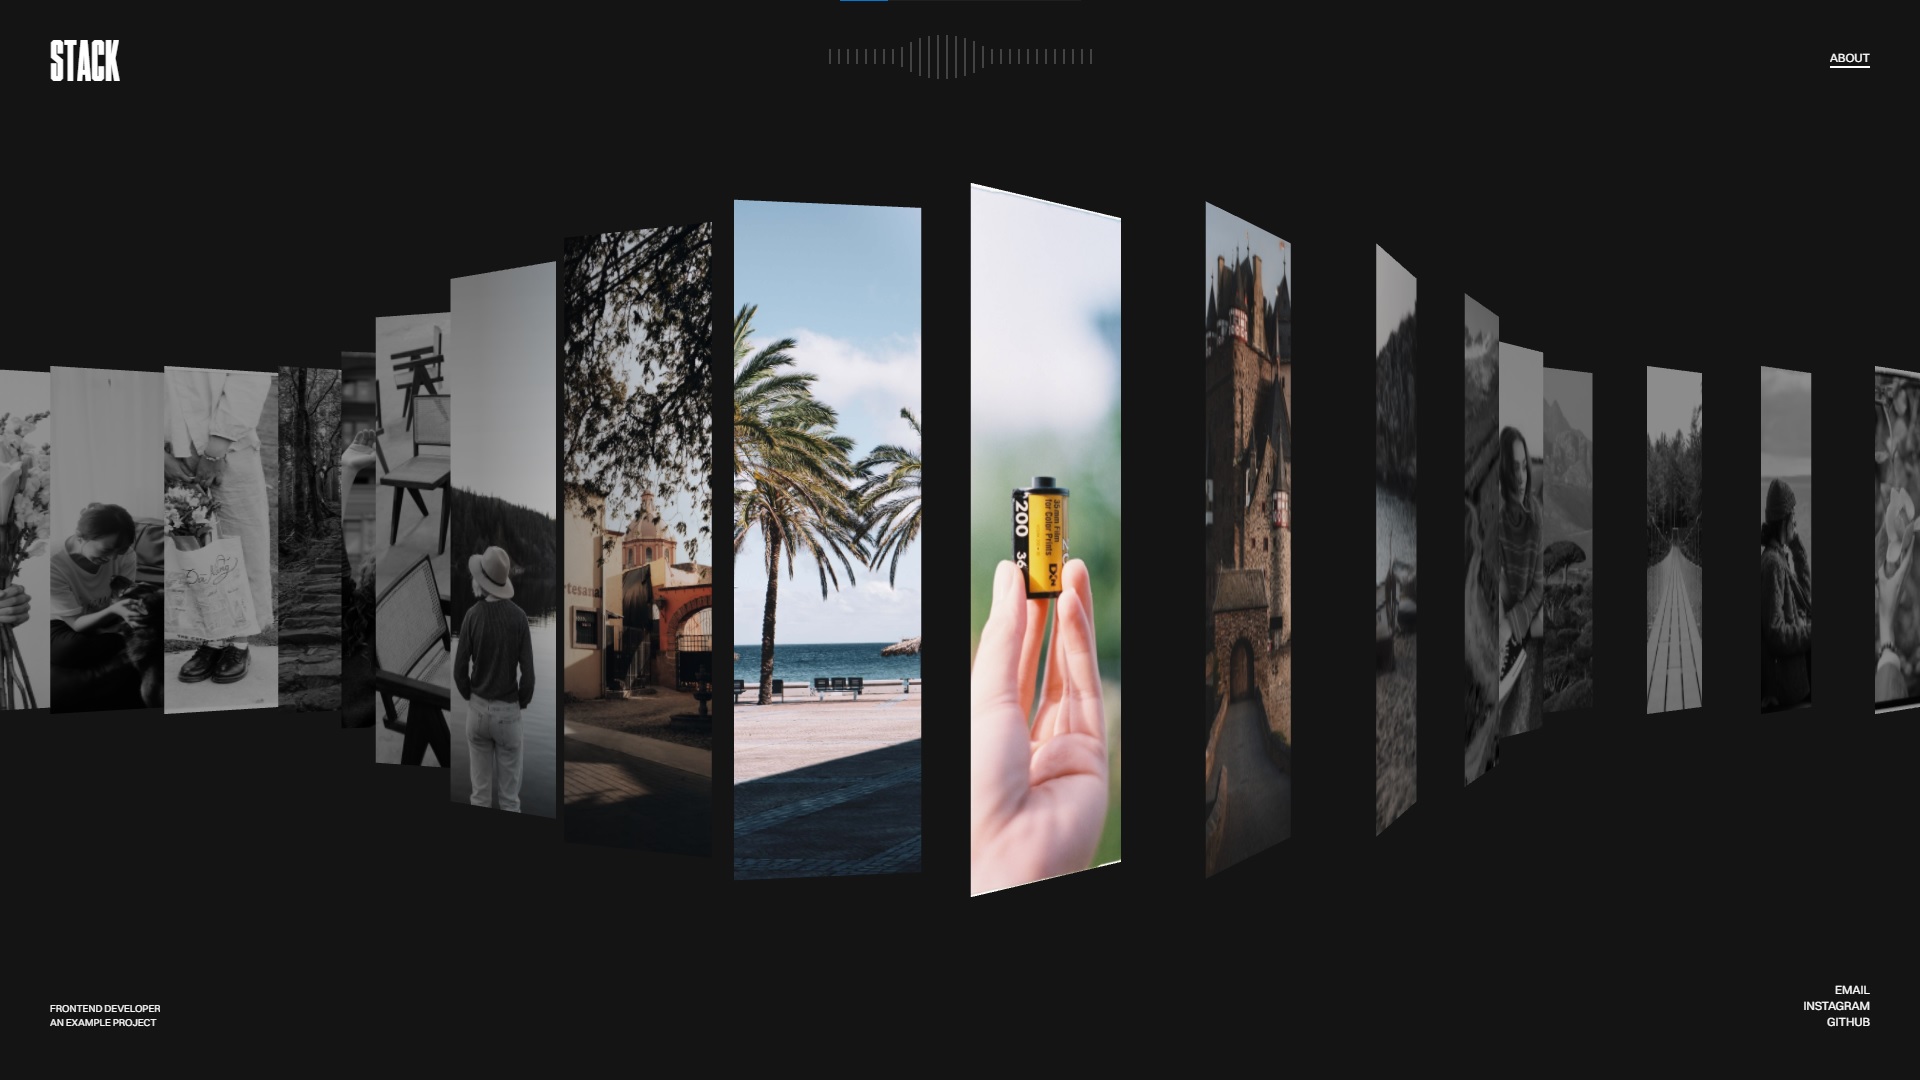
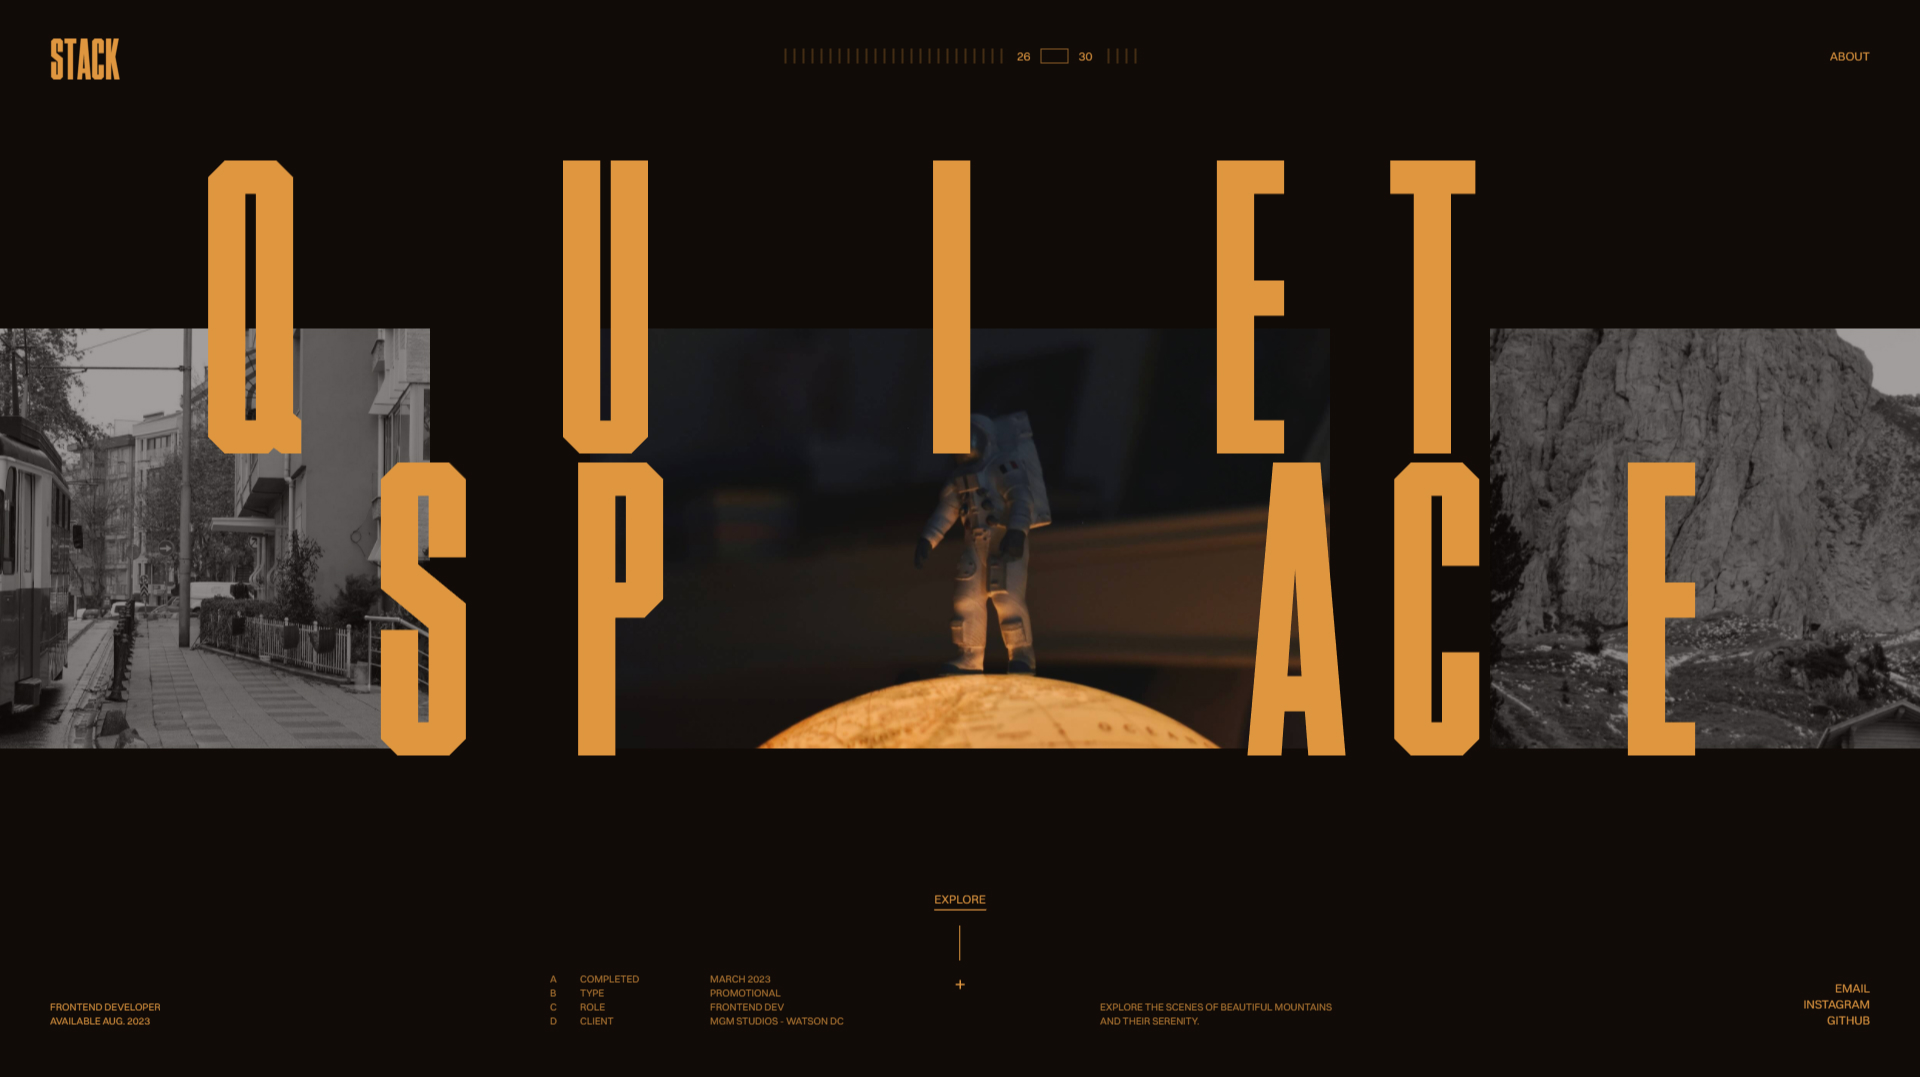
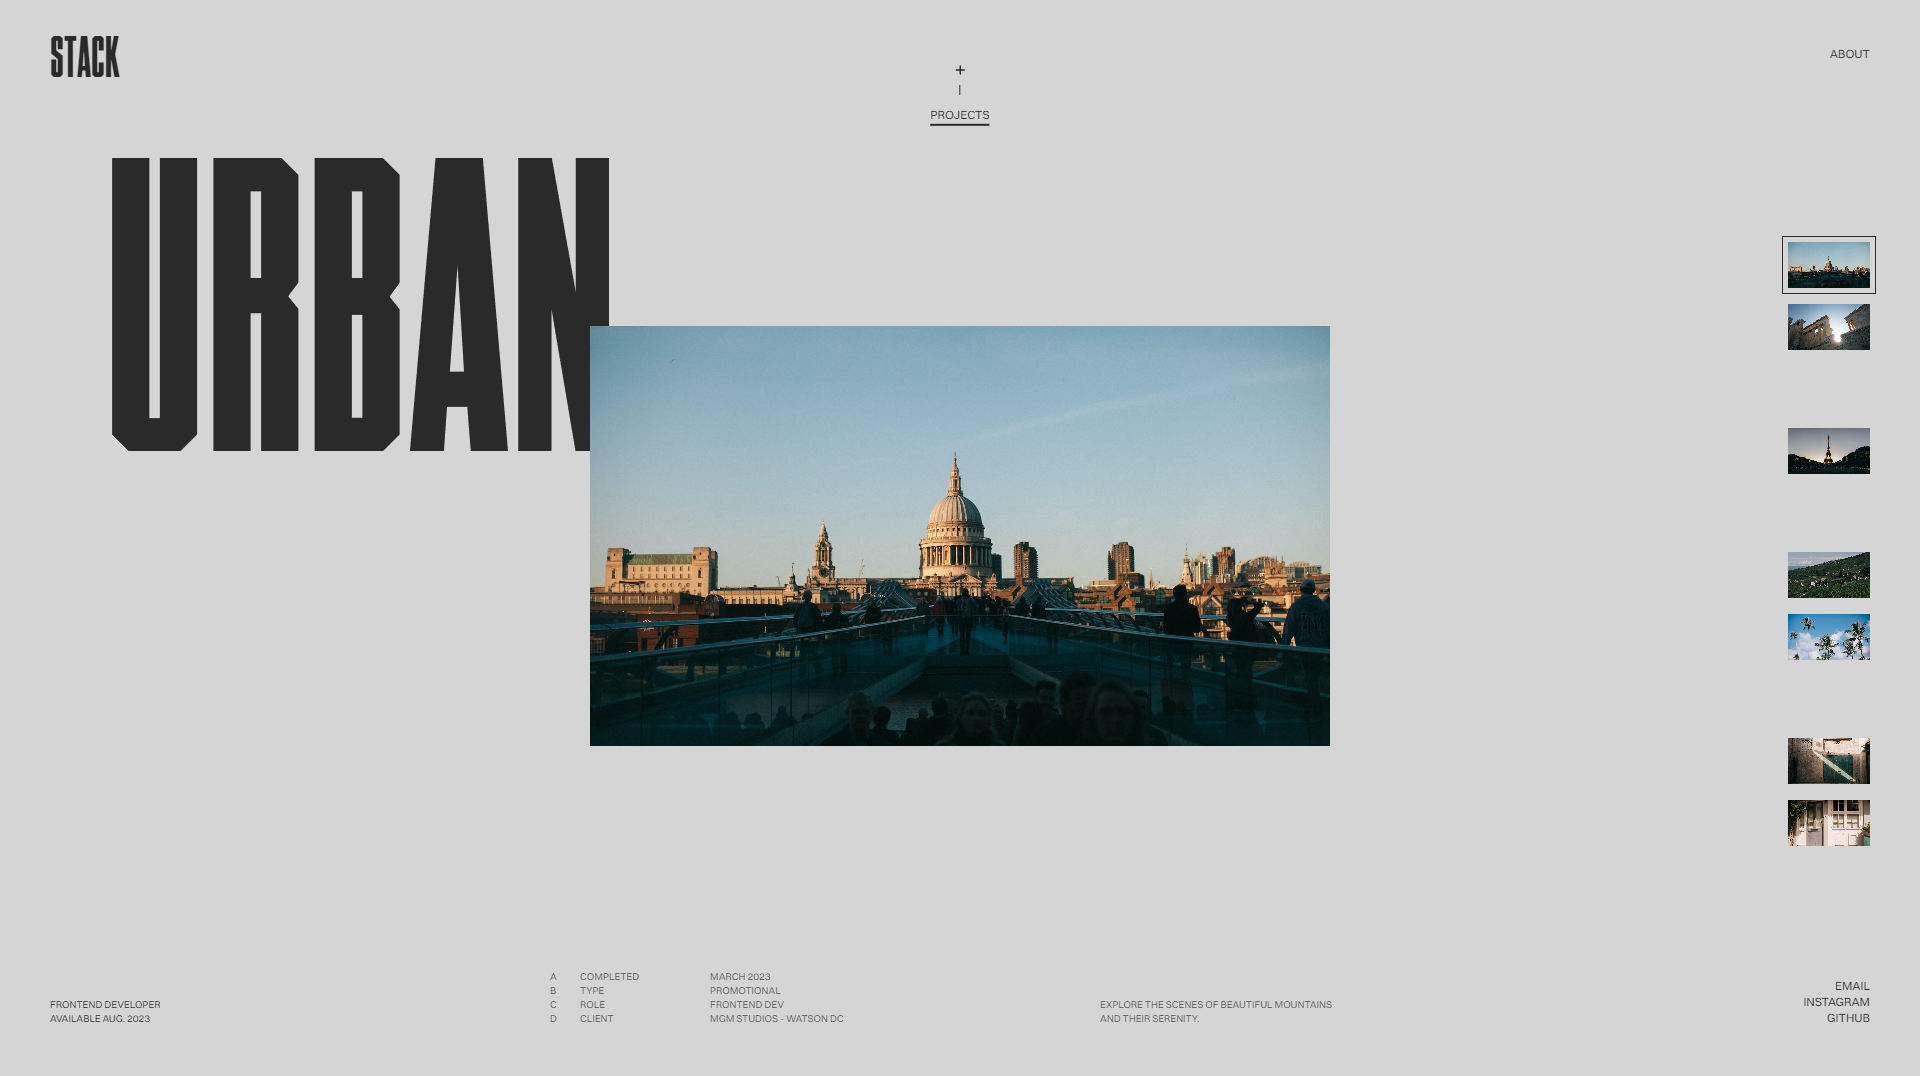

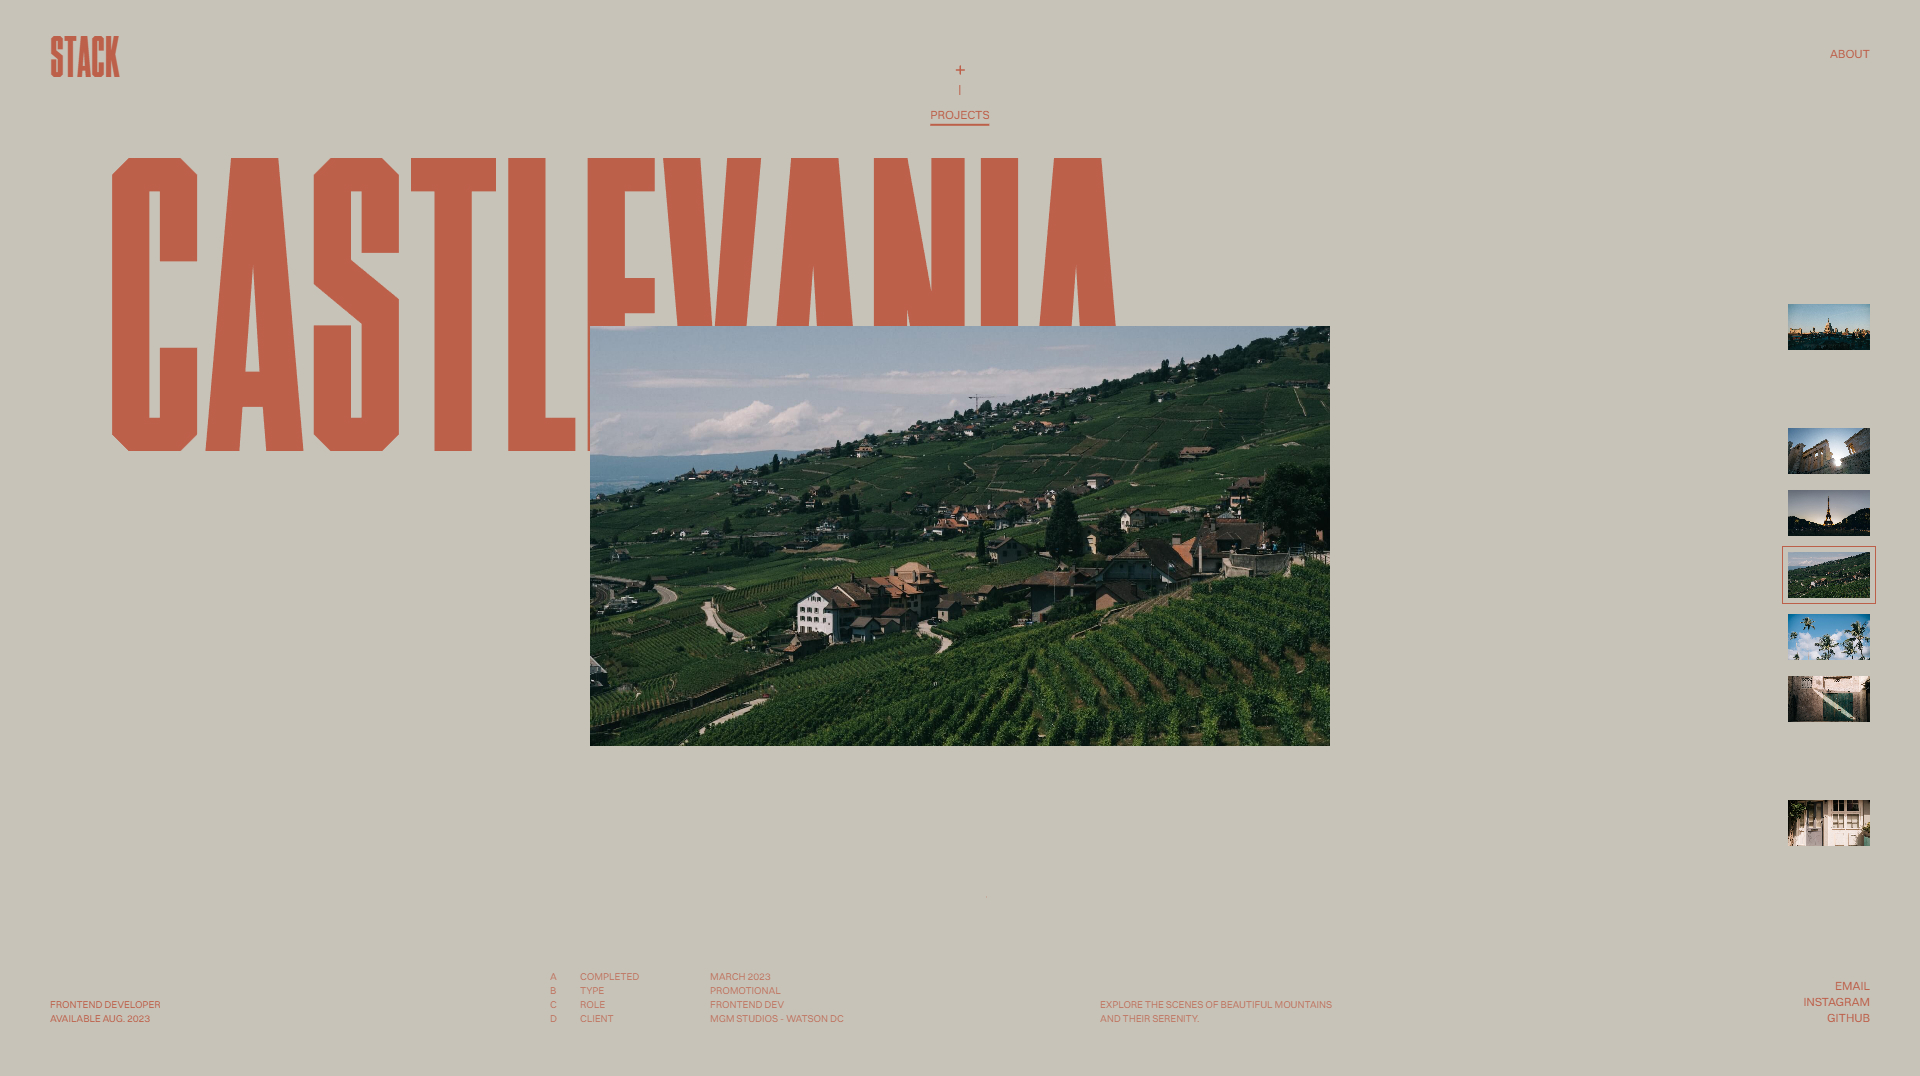

The final version of website.
Noteworthy
It is quite difficult to cover every small detail and workaround in a single article, however, when you start working on them and comparing your result with the original website you will see how much effort is put into it.
For example, when the overall page is in an expanded state, and when you scroll and trigger the collapsing animation, you may notice that the rectangle bends in an S-like shape. For sure, it is related to the geometry and vertex shader, but I am not sure how it exactly works yet. Such small details make Aristide's works one of the best in the industry in my opinion. It is simply an art.
Conclusion
I have achieved my dream of creating a WebGL project of such complexity. I have learned a lot about ThreeJS and WebGL in general and the complicated aspects such projects may harbour. Who knows what awaits me in the future?